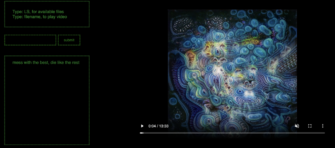
As a reminder, I had just watched the movie Hackers and was in search of more nostalgia. So I scrubbed through the movie and found a fun scene where two hackers battle for control over a T.V. station. So I thought I would try to recreate it in the form of an interactive website. I wanted the interaction to be kind of like using the command line in a terminal. That was a little tricky but I eventually got it working. There are still some features I would like to work out, like video synchronization when a user scrubs the video, as well as pausing and resuming play, streaming your own video, and usernames. I also tried to format the page using CSS, something I haven’t really put much time into in the past.
The clip at the right is the scene from the movie that inspired this project. The code for the project is below.
HTML
<html>
<head>
<link rel="stylesheet" href="style.css">
<script type="text/javascript" src="/socket.io/socket.io.js"></script>
<script type="text/javascript">
let videoArr = ["YourName.mp4",
"TheWall.mp4",
"2001ASpace Odyssey.mp4",
"SevenSamurai.mp4",
"HeavyMetal.mp4",
"Hackers.m4v",
"GhostInTheShell.mp4",
"FantasticPlanet.m4v",
"Alien.m4v",
"Akira.mp4",
"AdriftInTheOcean.mp4",
]
var socket = io.connect();
socket.on('connect', function() {
console.log("Connected");
// Once we are connected, request the history
socket.emit('history', null);
});
// Receive from any event
socket.on('chatmessage', function (data) {
document.getElementById('messages').innerHTML = "" + data + "\n<br />"
+ "" + document.getElementById('messages').innerHTML;
if(videoArr.includes(data)){
let myVideo = document.querySelector("video")
myVideo.src = data;
myVideo.load();
myVideo.play();
console.log(data)
}
});
var sendmessage = function(message) {
if(message === "ls"){
videoArr.forEach((item) => {
document.getElementById('messages').innerHTML = "" + '<span style="background: white;">' + item + "</span>" + "\n<br />"
+ "" + document.getElementById('messages').innerHTML;
})
}
console.log("chatmessage: " + message);
socket.emit('chatmessage', message);
debugger;
};
</script>
<style>
#messages{
color: rgb(16, 139, 37);
}
#instructions{
color:rgb(16, 139, 37)
}
</style>
<head>
<meta charset="UTF-8" />
<meta http-equiv="X-UA-Compatible" content="IE=edge" />
<meta name="viewport" content="width=device-width, initial-scale=1.0" />
<title>ITP TV</title>
</head>
<body>
<div id="main">
<div id="video-container">
<video id="video" width="720" height="480" autoplay muted controls>
<source id="video-player" src="AdriftInTheOcean.mp4" type="video/mp4">
Your browser does not support the video tag.
</video>
</div>
<div id="instructions">
Type: LS, for available files<br>
Type: filename, to play video
</div>
<div id="input-box">
<input type="text" id="message" name="message" value=" ">
<input id="submit-button" type="submit" value="submit" onclick="sendmessage(document.getElementById('message').value)">
<script>
let input = document.getElementById("message");
input.addEventListener('keypress', (event) => {
if(event.key === "Enter"){
event.preventDefault();
document.getElementById('submit-button').click()
document.getElementById("message").value = "";
}
})
</script>
</div>
<div id="messages">
mess with the best, die like the rest
</div>
</div>
</body>
</html>
JAVASCRIPT
// Database to store data
var Datastore = require('nedb');
var db = new Datastore({filename: "data.db", autoload: true});
const express = require("express");
const app = express();
const path = require('path');
var http = require('http');
var fs = require('fs');
// HTTP Portion
var httpServer = http.createServer(app);
const { Server } = require('socket.io');
const io = new Server(httpServer, {});
httpServer.listen(8070);
function requestHandler(req, res) {
// Read index.html
fs.readFile(__dirname + '/index.html',
// Callback function for reading
function (err, data) {
// if there is an error
if (err) {
res.writeHead(500);
return res.end('Error loading index.html');
}
// Otherwise, send the data, the contents of the file
res.writeHead(200);
res.end(data);
}
);
}
app.use('/', express.static(path.join(__dirname, 'public')));
// Register a callback function to run when we have an individual connection
// This is run for each individual user that connects
io.sockets.on('connection',
// We are given a websocket object in our function
function (socket) {
console.log("We have a new client: " + socket.id)
// When this user emits, client side: socket.emit('otherevent',some data);
socket.on('chatmessage', function(data) {
// Data comes in as whatever was sent, including objects
console.log("Received: 'chatmessage' " + data);
// Create the JavaScript Object
var datatosave = {
socketid: socket.id,
message: data
}
// Insert the data into the database
db.insert(datatosave, function (err, newDocs) {
console.log("err: " + err);
console.log("newDocs: " + newDocs);
});
// Send it to all of the clients
io.sockets.emit('chatmessage',data);
});
// When the history is requested, find all of the docs in the database
socket.on('history', function() {
db.find({}, function(err, docs) {
// Loop through the results, send each one as if it were a new chat message
for (var i = 0; i < docs.length; i++) {
socket.emit('chatmessage', docs[i].message);
}
})
});
socket.on('disconnect', function() {
console.log("Client has disconnected " + socket.id);
});
}
);
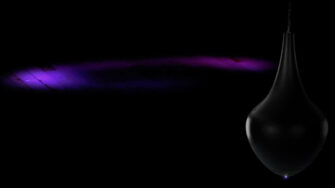
This work consists of two spaces experienced one at a time in sequence: the first in the form of an ephemeral light painting, and the second is the mechanism by which the light painting was made. In creating this work [sculpture] in an iterative and open-ended way, I explored the relationship between experience and interpretation, learned more about the relationship between the spaces I created, and asked questions about subjectivity and the value of experience.
Visualization of installation before entering.
Visualization of installation showing the projection room on the left and the pendulum room on the right.
Abstract
Through b.o.b., I am examining how meaning is assigned to experiential art.With little information before entering, the viewer fully immerses themselves in the environment, and thus the experience relies on your subjectivity: assumptions, definitions, conclusions, and meanings.
The installation begins with two doors; which door you enter is your choice, but the choice dictates your experience and understanding of the installation. Although you don’t have information about the door you choose, the choice is yours and the experience. The meaning is yours alone, based on your unique perspective.
Regardless of your choice, this installation uses light and the abstraction of time to facilitate an understanding of experience, apparent choice, and meaning-making. The installation is not complete without you.
I created b.o.b by building a 22” x 13” pendulum and suspending the pendulum in a dark room. The pendulum’s weight amplifies the movements of the gantry, which draws more attention to the rhythm and pattern. The adjacent room is just as dark and consists of a projector that reveals the pendulum’s movement, thereby creating the ephemeral light painting for the viewer to discover. Both spaces are dark with focused light in specific areas to highlight and draw attention to the focal point, either the pendulum or the light painting.
While reading through the comments, anecdotes, and testimonies of those who experienced b.o.b, I found that every person’s experience of the installation was unique. My goal was to create this work for people to enter with limited guidance and information and tune into their curiosity and discovery processes for finding meaning in an experience
Research/Context
This project started as a way to understand the kinetic energy of a moving object. Light traced a path and, when recorded, gave insight into the history of its movement. The artifacts produced from this process had so much depth and character that I couldn’t stop coming back to them. I started to think of how I could change or interact with the object to inform the artifact. I then looked at conceptual artists and how they invited users to experience their art/installations. I looked to a few artists for inspiration: James Turrell, Robert Irwin, Rafael Lozano-Hemmer,Mary Corse, and Bruce Nauman.
James Turell said it best, “My desire is to set up a situation to which I take you and let you see. It becomes your experience”
Irwin writes, “When you walk into a room, you assess it instantaneously, habitually, before becoming aware of it. You make sure there’s not a hole you’re going to fall into, but mostly you’re not even aware of what you’re thinking.”
For the physical construction of this installation, I had to balance strength, weight, cost, and durability. Each component had to work as a system, so cross-compatibility was critical. I also needed a way to stream live media from a camera to another computer running Touchdesigner; a Raspberry PI is used for the camera component and the streaming platform. Those four factors ultimately led to the choice of the specific x/y gantry and 3D printing of the “massive bob” from ABS.
Technical Details
I used an x/y gantry, a Raspberry Pi, a Raspberry Pi high-quality camera, a 4-inch midrange speaker, a 50-watt amp, an Arduino Nano Every, an RGB LED, 3/4 inch plywood, Stratasys Fortus 450 for 3D printing python, Touchdesigner, Rhino 7, Solidworks 2021, LightBurn, OpenBuilds Cam control, VNC.
Further Reading
I started this project with many assumptions about how people would interact with it and how I wanted to craft the experience. After user testing it at full-scale, I found some of those assumptions weren’t accurate. I had always thought viewers would enter into the pendulum room; however, after observing the installation for a few hours, I left the decision of what door to enter through up to the viewer. I also initially placed a lot of weight and emphasis on having the pendulum be reactive to the viewers in the room again; I found that this made no apparent difference in the experience. I wanted viewers to think about what they saw, so I split the installation into two spaces. Hopefully, dividing the space will cause people to contemplate the connection between the two spaces. I used an x/y gantry to create a variable pivot point for a pendulum. G-Code patterns control the gantry’s movements. A contact microphone connected to the gantry picks up the sounds of the motors; that signal is amplified and broadcast through a speaker embedded inside the pendulum. At the bottom of the pendulum, an LED is used to illuminate the pendulum’s path. Sitting beneath the pendulum is a camera that records the pendulum’s movement. The camera is connected to a Raspberry PI that live-streams the pendulum’s motion using NDI protocols. The NDI stream passes into Touchdesigner, where light trails are created from the pendulum’s movement through a series of operations. The light trail is then projected onto the floor of the adjacent room from the pendulum.
In thinking about my final project for LiveWeb, my mind jumped back a decade or two to a movie I still watch very frequently…HACKERS. There is a scene in particular that I was thinking about, the tv station scene. At right you can see the clip from the movie. In the scene Zero Cool now known as Crash Override hacks into a tv station to watch what he want to watch. Not necessarily needed in today’s stream centered view experience but novel none the less. While there he is met face to face with, of all things, another hacker- Acid Burn. They fight over what will air for the individual viewing pleasure. Burn eventually wins and boots Crash Override for the network.
So my idea is to create a viewing window with a library of videos around it as well as the ability to “go live” to let users compete for dominance in the space.
I spoke with three alumni during the Alumni Feedback event, overall I would say this was helpful if for no other reason than to get use to talking about the project to people who are unfamiliar with it. I would say I was very pleased with the interest and feedback of two of the alumni, however, the alumni I was most excited to talk with was uninspiring and gave little useful feedback.
Here, listed as combined list, is the feedback I received:
How can I get concise as to what iteration number entails?
Could the people in the projection room also have interaction with the pendulum?
Look into the nature of code to create different pendulum movements.
Looking into using heat sensors.
Basic blob detection could be useful in gathering data about what is happening in the room.
Incorporate threshold for different sensors i.e.: once a specific sensor reaches a threshold change to a different sensor.
Possibly look into cell phone signals as a way to gauge people in the room.
Amplify the sound of the motors instead of creating a sound.
Increase connection between pendulum room and projection room.
Sync the movements of the pendulum to an individual person.
Look into using IR instead of visible light so the pendulum does not cast colored light onto the floor.
I think everything that was said was very relevant, however, for the first iteration I won’t be able to research or include many of the suggestions. I was able to incorporate the idea of amplifying the motor sound instead of creating a sound for this installation on April 2nd.
As of now I have everything working. I’m still tweaking a few parts of the touch designer sketch and need to finish fabrication of the pendulum and the base for the gantry. But both of those are well on their way to being finished.
Just a little bit of practice with two different GANS this week. I used a version of Next Frame Prediction (NFP) and StykeGan2-ADA from Derrick Schultz, both notebooks can be found below:
Both notebooks are pretty straight forward to use. For the NFP I used a trippy animation by Anthony Francisco and can be found here
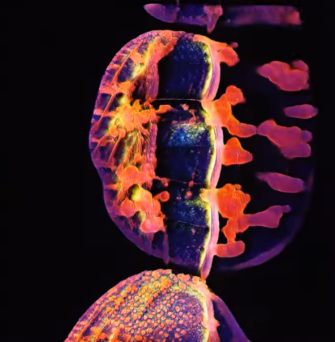
For StyleGan-ADA I trained a custom dataset with microscopic images of cells, the model needs way more training but its nice to see where it stands currently.
After many hours alone, I succumbed to need for help. I sent the up signal and it was answered by none other than the prolific CODING LAB. Partners in help David Currie and Wasif Hyder on two different occasions helped to correct my course and teach me how to change the errors I had made.
The idea for this project remains the same as last week, a tool for relaxation allowing multiple users to control the output. The interactions have strict confines in order to keep chaos from taking over, this is supposed to be a relaxation tool after all.
Users can control the x and y location of an ellipse that is drawn to the canvas. Along with x and y, users can control color, stroke, direction and starting degree of rotation, framerate, and an adjustment variable called “rep”. There are two viewing options inset and full-width as well as the ability to reset the canvas to clear the current drawings.
The heart of the code is really this little block right here:
I was only able to test it with 3 or 4 users at a time, so I’m not sure how many users at a time this will support. There is a lot of data coming through the pipe here. I’m sure there is a better way of doing it, like only sending data when a change is made but I wasn’t able to figure out how to do that right now.
Have fun with it, relax, and let me know if anything breaks.
Two users, one in green-yellow, the other in red.
Two users after some time has past with many changes being made over the course of the draw loop.
Its been a while since I could look at…ok I’ll stop with the ridiculous Stained reference. But I have made significate progress all around.
MASSIVE BOB
Massive bob is in production. All hardware and parts have been received. In order to decide the final form of the massive bob I used an Instagram poll to see what the community thought. I ultimately used the form the community picked with a few teaks to refine the overall shape. (insert poll photo and final form photo, light study video)
Image of the seven forms proposed for the massive bob.
Final form for the massive bob, I used #4 from the previous image with a few minor tweaks to refine it.
Section view of the massive bob showing the internal structure and mounting for the speaker and pcbs.
Light test for the seven versions of the massive bob, I used this to determine if all seven options would be put forth in the poll.
XY GANTRY
Gantry is assembled and works as expected. Currently I’m running the gcode through openbuild’s grbl interface. I’m trying to install the software on a RaspberryPi so that I can have a tidy package to install on grid structure where this will be installed. I will then VNC into the RPi for control of the software.
Short test of paths.
Another short test of the paths.
Interactions: Tangible
The interactions have been a major point of struggle. After a lengthy conversation with Sarah, I came to the conclusion that I don’t need to sort out the interactions at this point in time. I know that may sound counter intuitive, however, the truth is this installation needs to be user tested and prototyped at full scale. For the upcoming installation I will have a few types of paths preprogramed into the system, after a viewer interacts with the installation I will ask them to answer a few questions about the experience. I currently have a four test paths that last a few hours each. I’m also planning to include the ability for me to use a joystick to make random movements as well.
Continuous curved line test path.
Spiraled array test path.
Randomly generated overlapping circles test path.
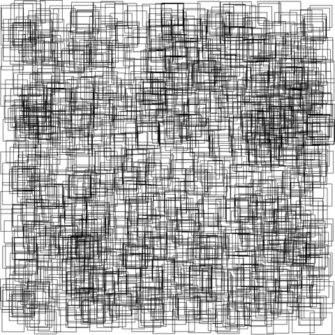
Randomly generated overlapping squares test path.
PROJECTION
I am able to stream video from an RaspberryPi over the web and cast it to Touchdesigner. I have implemented a few ways to bring the video into TouchDesigner but I haven’t found the best option as of yet. I still need to work on the Touchdesigner flow, it works in some instances and not others, I also need to reverse the drawing order of the cached pixels, right now the new pixels are drawn behind the previous. Some of this will need to be tweak during initial installation to take into account the environmental factors.
Five different iterations of the Touchdesigner flow.
First let me say that I am still struggling with the syntax and order of the required documents in order to have an interactive web experience. For instance, when I look at a p5.js sketch it is hard to figure out how to translate it to a standard JavaScript document that works with a server. Where and what gets emitted. If I have a canvas and a set of ui elements that each new user should have on their screen, how do I denote that in the code.
That being said for my midterm project I’m trying to convert the below p5.js sketch so that each new user adds another instance to the canvas and the ui displayed allows the user to control only their own instance.
In this column you will find the code I am working to convert. Of course there is the addition of the server code. I have not included the code for the p5.js library or the p5,sound.min.js library.
// Express is a node module for building HTTP servers
var express = require("express");
var app = express();
// Tell Express to look in the "public" folder for any files first
app.use(express.static("public")); // This is where the HTML, p5.js, sketch.js and so on should be stored
// If the user just goes to the "route" / then run this function
app.get("/", function (req, res) {
res.send("Hello World!");
});
// Here is the actual HTTP server
var http = require("http");
// We pass in the Express object
var httpServer = http.createServer(app);
// Listen on port provided by Glitch
//httpServer.listen(process.env.PORT);
// OR if running your own server choose your own port
httpServer.listen(8080);
// WebSocket Portion
// WebSockets work with the HTTP server
var io = require("socket.io")(httpServer);
// Register a callback function to run when we have an individual connection
// This is run for each individual user that connects
io.sockets.on(
"connection",
// We are given a websocket object in our function
function (socket) {
console.log(socket.id + " has joined the chat.");
socket.on("mouse", function(data) {
//io.emit("mouse", data);
socket.broadcast.emit("mouse", data);
});
socket.on("disconnect", function () {
console.log(socket.id + " has disconnected.");
});
}
);
sketch.js
var socket = io.connect();
socket.on('connect', function() {
console.log("Connected");
});
let x1 = 0;
let y1 = 0;
let col1 = 10;
let strk1 = 1;
let frmRt = 30
let shape1 = false;
let deg1 = 0.33
let rep = 2;
function setup() {
createCanvas(400, 400);
background(0, 0, 0);
angleMode(DEGREES);
colorMode(HSB, 360, 100, 100, 100);
// rectMode(CENTER);
// frameRate(frmRt);
create_ui();
}
function draw() {
frameRate(frmRt);
slider_value('Rep', rep);
slider_value('frmRt', frmRt);
slider_value('x1', x1);
slider_value('y1', y1);
noFill();
translate(width / 2, height / 2);
// push();
// rectMode(CENTER);
if (shape1) {
ellipseMode(CENTER);
push();
// stroke(0, random(0, 85), 0);
// stroke(85, random(0, 85), 85);
strokeWeight(strk1);
stroke(col1, 100, 100, 50);
rotate(x1 / deg1);
// rect(x, y, rep * (random(1, 10)), rep * (random(1, 10)));
// ellipse(t1, t2, 10, t1 + 45);
ellipse(x1, y1, 10, x1 + 45);
// rect(x, y, rep * x + 1, y + 5);
// x = x + 5
pop();
x1 = x1 + rep;
if (x1 > width) {
x1 = 0;
y1 = y1 + rep;
}
} else {}
}
So I’m trying to get some p5.js working in a droplet from digitalocean and guess what….I can’t get it to work. I know the p5.js sketch works, I can run it in the p5 web editor. I’m sure there’s something I’m doing wrong. To be quite honest, I don’t really understand how to structure the different blocks of code and what file they belong in. I’m also not sure what the best way to structure the file in my virtual private server. And can I name these files anything I want? Cause right now I feel like I have a number of files with the same name, I’m sure that could be causing issues. I’ll keep trying to work through it but for now here is the code, be fore warned there is a bunch…
// Express is a node module for building HTTP servers
var express = require("express");
var app = express();
// Tell Express to look in the "public" folder for any files first
app.use(express.static("public")); // This is where the HTML, p5.js, sketch.js and so on should be stored
// If the user just goes to the "route" / then run this function
app.get("/", function (req, res) {
res.send("Hello World!");
});
// Here is the actual HTTP server
var http = require("http");
// We pass in the Express object
var httpServer = http.createServer(app);
// Listen on port provided by Glitch
//httpServer.listen(process.env.PORT);
// OR if running your own server choose your own port
httpServer.listen(8080);
// WebSocket Portion
// WebSockets work with the HTTP server
var io = require("socket.io")(httpServer);
// Register a callback function to run when we have an individual connection
// This is run for each individual user that connects
io.sockets.on(
"connection",
// We are given a websocket object in our function
function (socket) {
console.log(socket.id + " has joined the chat.");
socket.on("mouse", function(data) {
//io.emit("mouse", data);
socket.broadcast.emit("mouse", data);
});
socket.on("disconnect", function () {
console.log(socket.id + " has disconnected.");
});
}
);
This week I mostly worked with text-to-images notebooks in Google Colab. I also tried some style transfer notebooks, but to be honest I don’t really find them that interesting. Maybe I’m not using them right but a lot of my outputs feel like they are just layered photoshop files.
Lets get started with text-to-image. First up
Hypertron 2.0
Prompt: A spaceship, by Hakashina Mokinato. A brutal Style.:1 | Trending on ArtStation, unreal engine. 8K 3D. Volumetric lighting.:0.75
I used 2000 steps (iterations); the imagenet_16384, coco, and wikiart_1024 models; and 480×480 to get the final image.
Below are a selection of steps, as the steps progress it get to a point where the changes in image are less significant. If time was a factor I probably would have around 900 steps.
Illustrip 3D
I made two different trips with this notebook. Iused the same prompt as the Hypertron 2.0 to see the difference in the output.
Prompt: A spaceship, by Hakashina Mokinato. A brutal Style.:1 | Trending on ArtStation, unreal engine. 8K 3D. Volumetric lighting.:0.75 3d hyper real
For this style transfer I started with a content image and a style image. After I made the composite from the two images I also tried giving the content image a weight of 0 to create a new texture image. I did this twice once with 100 steps and 1000 steps.